
Complete Guide to Setting Up and Transferring eSIM on Android Phones
Introduction: The Evolution from Physical SIMs to Embedded SIM (eSIM) Technology
Embedded SIM (eSIM) technology has completely transformed mobile connectivity, allowing Android users to activate cellular plans, switch carriers instantly, and download international travel data packages without ever handling a physical plastic SIM card. This comprehensive tutorial walks you through eSIM QR activation, carrier-to-carrier transfer tools on Pixel and Galaxy phones, and dual-SIM management.
This guide also flags common pitfalls to avoid during eSIM setup and transfer.
For over three decades, physical Subscriber Identity Module (SIM) cards served as the primary authentication key connecting mobile phones to cellular networks. From full-sized credit-card SIMs down to micro and nano-SIMs, physical subscriber cards required hardware trays, ejector pins, and physical swaps whenever changing carriers or traveling abroad. However, the smartphone industry has entered a transformative era dominated by eSIM (Embedded SIM) technology.
An eSIM is an architecture built around an integrated chip soldered directly onto your Android device’s motherboard—technically designated as an eUICC (Embedded Universal Integrated Circuit Card). Unlike legacy physical SIM cards that store static network credentials on a single piece of hardware, an eUICC chip is rewritable. It allows mobile operators to wirelessly provision network credentials over-the-air (OTA) without requiring a physical card delivery or store visit.
The advantages of adopting eSIM on Android devices are substantial:
- Enhanced Physical Security: If your Android smartphone is lost or stolen, a thief cannot remove the SIM card to bypass tracking or disable cellular data. The eSIM profile remains locked to the hardware, allowing Google Find My Device to continuously track the device location.
- Multi-Profile Storage: Modern Android smartphones equipped with eUICC chips can store between 5 and 10 distinct eSIM profiles simultaneously, allowing you to switch cellular lines with a simple software toggle.
- Instant Activation: Activating a new mobile line or switching to a local carrier while traveling internationally takes minutes via QR code scanning or carrier app downloads, completely removing shipping wait times.
- Physical Space Optimization: Removing legacy SIM card slots allows phone manufacturers to allocate internal volume to larger battery capacities, improved thermal vapor chambers, and superior IP68 water and dust ingress resistance.
Prerequisites & Device Compatibility Verification
Before initiating eSIM setup or carrier transfer routines, you must verify that your Android smartphone meets hardware and software readiness criteria.
1. Verifying Embedded Identity Document (EID) Support
Every eSIM-compatible Android device possesses a unique 32-digit identification number called an EID (Embedded Identity Document). If your phone lacks an EID string, it does not contain the required eUICC hardware chip.
To locate your device’s EID:
- Open the Settings app on your Android device.
- Navigate to About Phone > Status Information (or SIM Status).
- Look for the EID entry. Alternatively, open your phone’s dialer pad and type
*#06#. A barcode pop-up screen will display your IMEI numbers alongside your 32-digit EID number.
Step-by-Step eSIM Activation Methods on Android
Mobile network operators provision eSIM profiles to Android devices using three distinct methods. Follow the walkthrough corresponding to the provisioning format provided by your network carrier.
Method 1: QR Code Scan Activation (Standard Carrier Protocol)
The vast majority of cellular providers issue a digital or printed activation kit containing a unique QR code. This QR code encodes an SM-DP+ (Subscription Manager Data Preparation) Address along with an activation matching code string.
- Ensure your Android device is connected to a reliable Wi-Fi network (active internet connectivity is strictly required to download cellular security certificates).
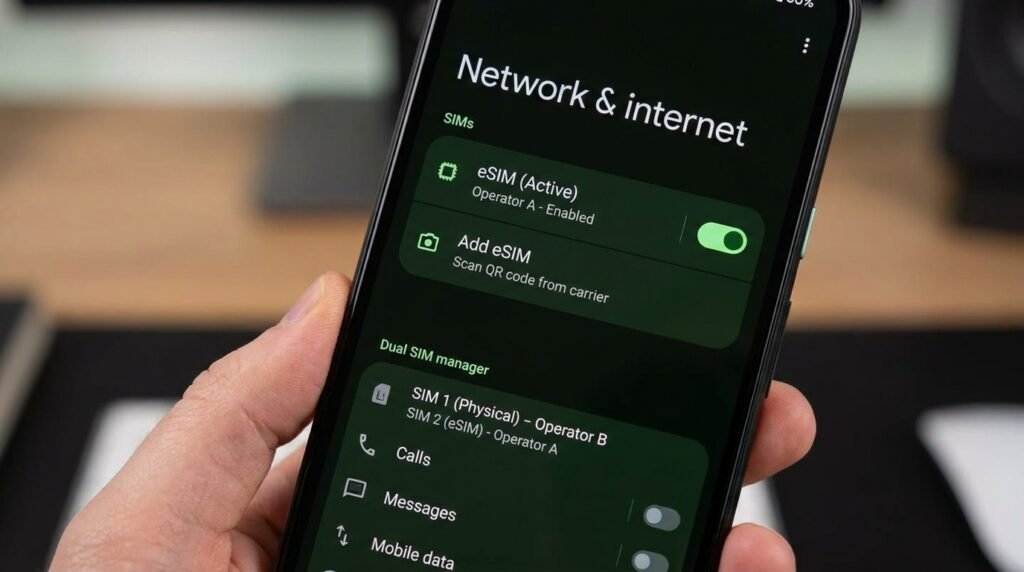
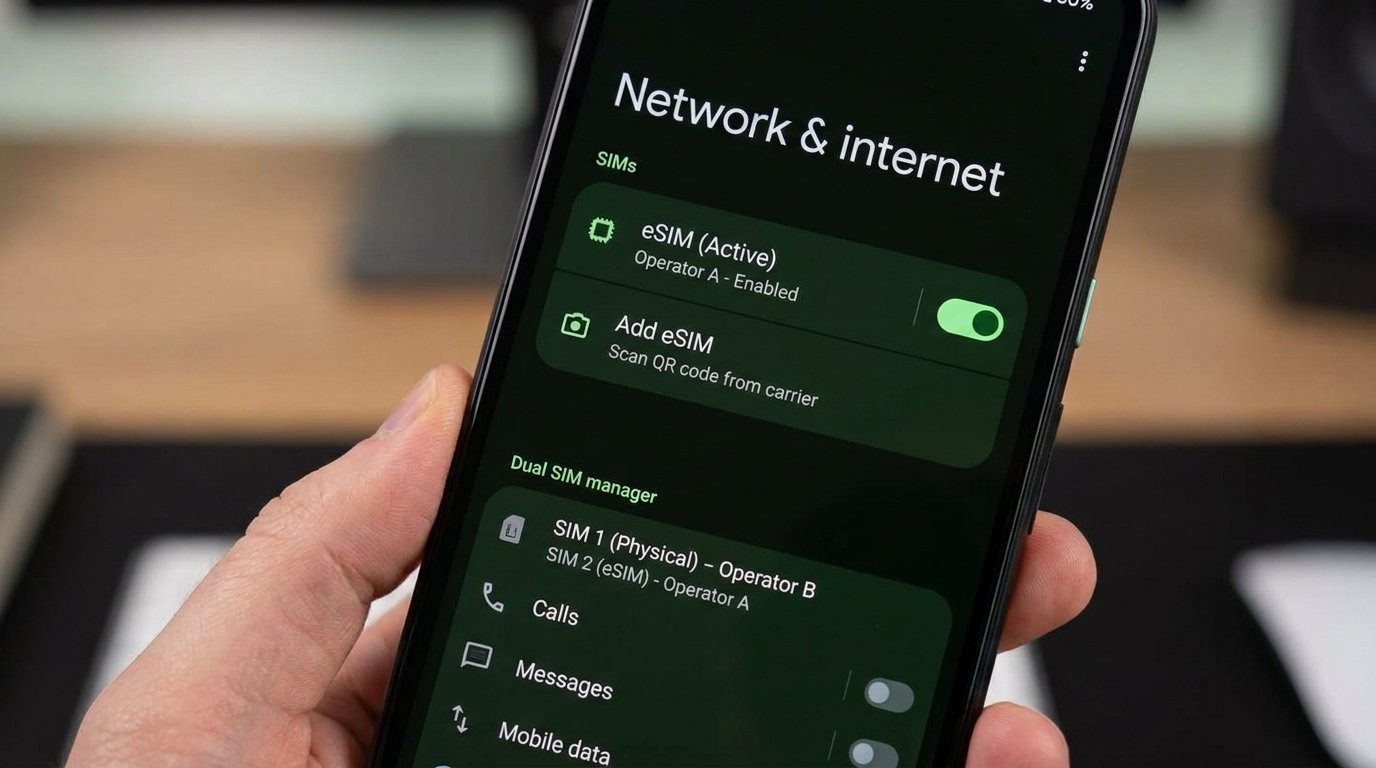
- Navigate to Settings > Network & Internet > SIMs (or Settings > Connections > SIM Manager on Samsung Galaxy devices).
- Tap Add eSIM or Download a SIM instead?
- When prompted by the system camera interface, scan the QR code supplied by your carrier.
- Once recognized, tap Download / Add Profile. The Android OS will establish a secure TLS session with the carrier’s SM-DP+ server and install the cellular credentials onto your eUICC chip.
- Tap Turn On to enable the newly installed mobile network line.
Method 2: Manual SM-DP+ Code Entry
If your camera cannot scan the QR code, or if your carrier provided activation details via text format, you can manually enter the provisioning string.
- Navigate to the QR code camera scanner screen within Settings > Connections > SIM Manager > Add eSIM.
- Tap Enter Activation Code (or Need Help? / Enter Manually).
- Input the SM-DP+ Address (e.g.,
cust-sub.prod.ondemandprov.com) followed by the Activation Code string provided by your network administrator. - If requested by your carrier, enter the Confirmation Code (a security PIN required by certain high-security corporate networks).
- Confirm the download to complete profile installation.
Method 3: Carrier App Push Activation
Major global telecommunications operators (including Verizon, T-Mobile, AT&T, EE, Vodafone, and Jio) support automated push activation through their official Android management applications.
- Download and install your carrier’s official mobile app from the Google Play Store.
- Log into your customer account using your billing credentials.
- Select Manage Line > Switch to eSIM or Activate New Device.
- Grant the carrier app permission to manage cellular profiles when prompted.
- The application will automatically register your phone’s EID with the backend billing system and push an Android system notification: “eSIM profile ready to install”.
- Tap the notification and select Install to complete setup without manual code entry.
Seamless Device-to-Device eSIM Transfer Protocols
Historically, transferring an eSIM between devices required contacting customer support or obtaining a new activation QR code. Modern Android ecosystems—specifically Google Pixel and Samsung Galaxy devices running recent Android versions—now feature built-in device-to-device transfer protocols.
1. Google Pixel eSIM Transfer Tool
Google introduced a native wireless eSIM transfer utility integrated into the Android setup wizard. This tool allows seamless transfers between supported Pixel devices and compatible carrier networks without manual intervention.
- Place your old Pixel device and your new Pixel device side-by-side with Bluetooth enabled on both phones.
- During initial device setup on your new phone, select Transfer SIM from another device when reaching the network connection phase.
- A prompt will appear on your old Pixel phone asking: “Transfer SIM to [New Phone Name]?”
- Tap Transfer and authenticate using your old device’s biometric fingerprint or PIN lock.
- A dynamic QR code will render on your old phone’s screen. Scan this code using your new phone’s setup camera.
- The old device will decommission its local eSIM profile while the carrier server re-provisions the credentials onto your new phone’s eUICC chip automatically.
2. Samsung Galaxy eSIM Transfer Utility (One UI)
Samsung offers a dedicated eSIM transfer protocol integrated into One UI across Galaxy S, Z, and Note series smartphones.
- On your new Samsung Galaxy device, open Settings > Connections > SIM Manager > Add eSIM.
- Select Transfer SIM from another device.
- Ensure your previous phone (Galaxy or supported Android running Android 14/15/16) is carrier-independent and nearby.
- Select the active cellular line you wish to migrate.
- Confirm the transfer notification on the old device screen. The system will securely handshake over Wi-Fi Direct/Bluetooth and register your new Galaxy EID with your mobile operator.
Configuring Dual-SIM Dual Standby (DSDS) Settings
One of the greatest functional advantages of Android eSIM integration is the ability to operate in Dual-SIM Dual Standby (DSDS) mode. DSDS allows one physical SIM card and one eSIM profile (or two active eSIM profiles on flagship Google Pixel and Samsung devices) to remain online concurrently.
Optimizing Primary Data, Voice, and Messaging Profiles
Once two SIM lines are active, configure your Android network routing rules to optimize mobile data performance and avoid unexpected roaming billing charges:
- Navigate to Settings > Network & Internet > SIMs (or SIM Manager).
- Set your default line preferences:
- Preferred SIM for Mobile Data: Assign to the carrier offering high-speed 5G data packages.
- Preferred SIM for Calls: Set to your primary voice line or select Always Ask to choose manually prior to initiating outbound calls.
- Preferred SIM for Messages: Assign your primary SMS line.
- Enable Automatic Data Switching (Android native fallback): This setting allows your phone to automatically switch to the secondary SIM for mobile data if the primary SIM loses coverage during an active voice call, preventing background data interruption.
International Travel eSIMs: Setup & Management (Airalo, Holafly, Nomad)
Frequent international travelers can bypass expensive international roaming tariffs by purchasing regional travel eSIM packages through specialized providers like Airalo, Holafly, and Nomad.
Best Practices for Installing Travel eSIM Profiles
- Pre-Departure Installation: Purchase and install your travel eSIM profile 24 hours before departing your home country while connected to your home Wi-Fi network. Do not turn the line on until landing at your foreign destination.
- Manual APN (Access Point Name) Override: Certain travel eSIM providers require custom APN strings to establish data routing through local roaming partners.
- Navigate to Settings > Mobile Networks > Access Point Names under your travel eSIM profile.
- Tap Add APN and input the specific APN name provided by your travel app (e.g.,
globaldataorwbdata). Save and select the APN.
- Preventing Primary Carrier Roaming Fees: Turn off Data Roaming on your primary home physical SIM / primary eSIM, while toggling Data Roaming ON strictly for your international travel eSIM profile.
Advanced Troubleshooting for Android eSIM Activation Failures
When eSIM installation routines fail, diagnostic error codes can obscure the underlying cause. Use these solutions to fix common eSIM issues:
1. Error: “QR Code No Longer Valid” or “Code Already Used”
eSIM QR codes are strictly single-use cryptographically signed tokens. If you previously scanned the QR code on an older device or interrupted an active download, the carrier server marks the token as consumed. You must request a fresh QR code or eSIM re-issuance token from your carrier’s customer portal.
2. Error: “EID Not Recognized by Carrier System”
If your mobile operator reports an “Invalid EID” during registration, your device IMEI 2 or EID was likely not populated into the carrier’s equipment identity register (EIR) database. Contact carrier tech support to manually whitelist your 32-digit EID string alongside your phone’s IMEI 2 slot.
3. No Service or Cellular Data Failure After Installation
If your eSIM shows signal bars but fails to establish a cellular data connection:
- Perform an IMS Registration Check: Open Dialer and type
*#*#4636#*#*. Select Phone Information, tap the three dots menu, and check IMS Service Status. Ensure Voice over LTE (VoLTE) and IMS Registration show Registered. - Execute a Reset Network Settings command: Navigate to Settings > System > Reset Options > Reset Wi-Fi, Mobile & Bluetooth. This clears corrupt cellular cache files without erasing installed eSIM profiles.
Android OEM eSIM Transfer & Dual-SIM Feature Matrix
| Device Manufacturer | Native D2D Transfer Tool | Dual Active eSIM Support | Max Stored eSIM Profiles |
|---|---|---|---|
| Google Pixel (Pixel 7 and newer) | Yes (Android Native Fast Pair Protocol) | Yes (MEP – Multiple Enabled Profiles) | 8 – 10 Profiles |
| Samsung Galaxy (S22, S23, S24, S25, Fold/Flip) | Yes (Samsung One UI SIM Transfer) | Yes (Dual eSIM active on S24/S25 series) | 10 Profiles |
| Motorola (Edge 40 / 50 / Razr Series) | Partial (Requires Carrier Support) | No (1 Physical SIM + 1 eSIM active) | 5 – 8 Profiles |
| Xiaomi / OnePlus (Flagship Series) | Manual QR Scan Required | No (1 Physical SIM + 1 eSIM active) | 5 Profiles |
Profile limits and feature availability reflect published manufacturer specifications and vary by model, region, and carrier; these are not laboratory measurements.
Conclusion
Transitioning from physical SIM cards to eSIM technology simplifies mobile line management, elevates hardware security, and eliminates friction when switching carriers or traveling abroad. By understanding EID registration protocols, leveraging native Android setup transfer tools, and configuring dual-SIM data fallbacks correctly, you can unlock seamless cellular connectivity across all your Android devices.
